


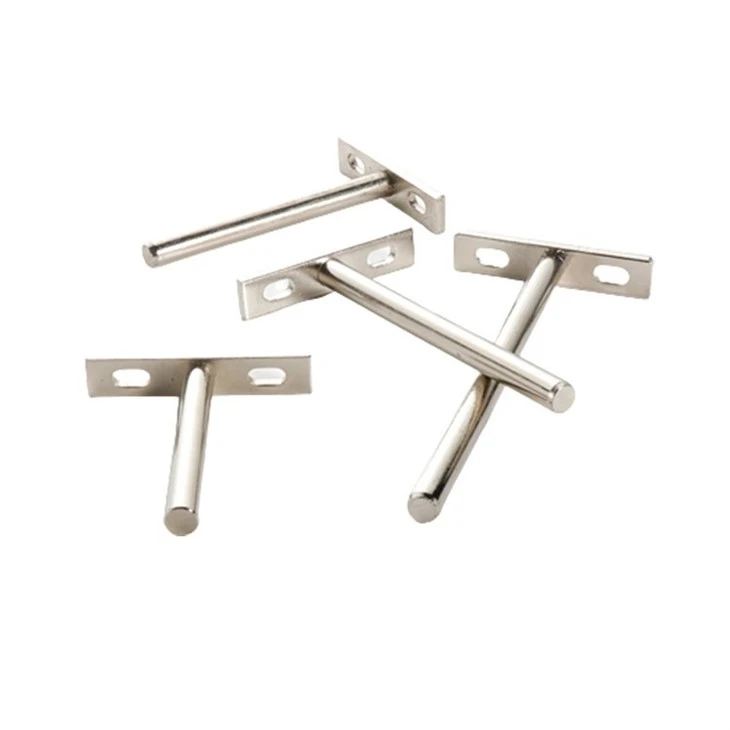

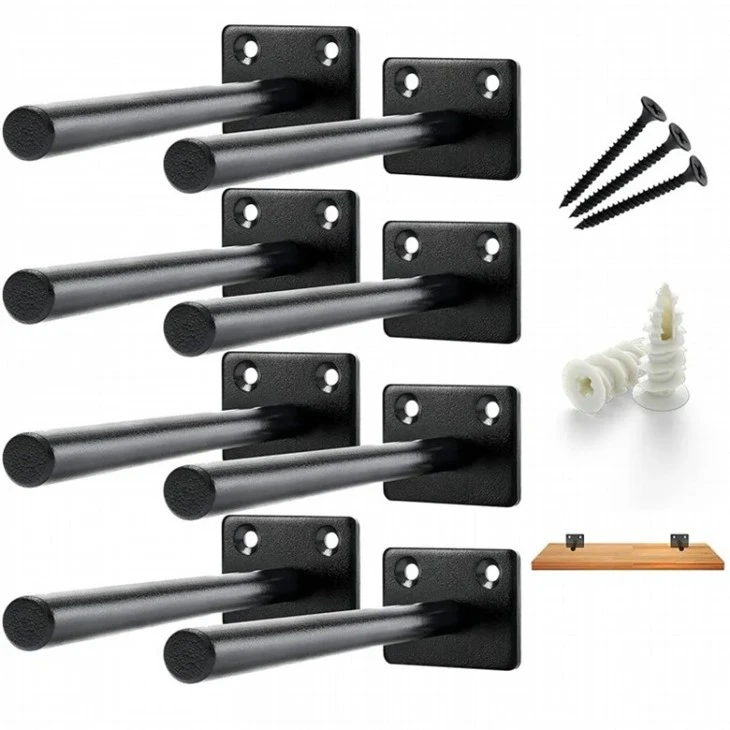
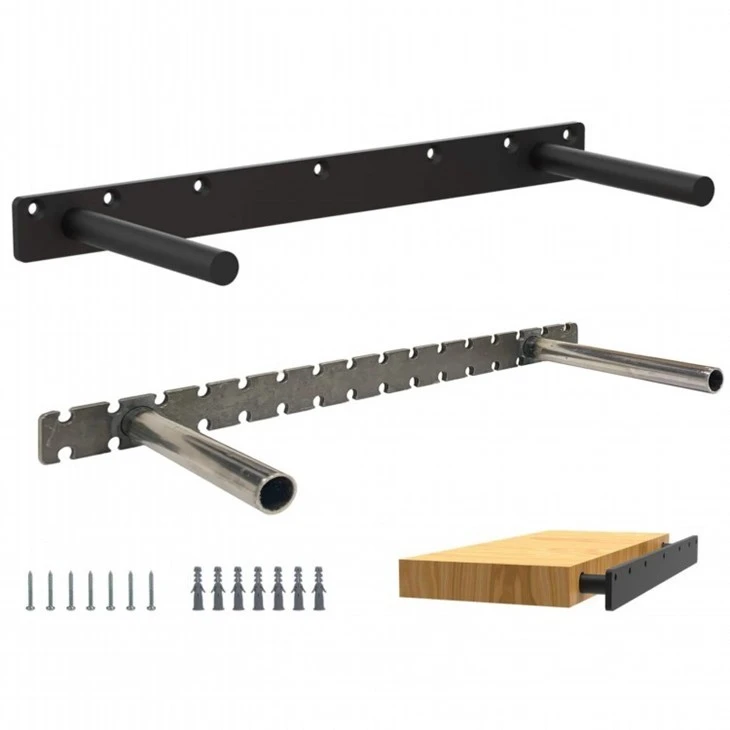
Invisible Wall Brackets
Item: Floating Shelf Brackets
Material: Metal iron
Finish: Powder Coating
Size & Color: As customized
Usage: Used for kitchen, living room, bedroom, bathroom, entryway
Packing: As customer's requirement
Lead Time: To be negotiated
Payment:TT 100% or 30% deposit, the balance before shipment
Sample: We can offer you free sample for your reference, but the postage is on your end.
What are Floating Shelf Brackets
Floating Shelf Brackets suspend a wooden shelf or mantel while remaining invisible or nearly invisible. Floating shelves and mantels are a modern design that needs specially designed hardware. When a shelf is floating, you can put items on the shelf or below without a standard shelf bracket being in the way.
The Advantages of Floating Shelf Brackets
Superior Holding Strength
One of the advantages of side mount shelving brackets is their ability to attach directly to your wall studs behind the drywall. You can attach these brackets before filling in the drywall around them. This helps these brackets have the full strength of the wall's foundation to successfully support heavy shelves, countertops, bar tops, benches, and more. Some specially sized brackets have the potential to support up to 470 pounds! It all depends on what size shelving you need and how much it will support.
Perfect for Floating Shelves
The fact that side mount shelving brackets start inside your drywall for support makes them perfect for hanging floating shelves. These heavy-duty hidden shelf brackets can support the weight of many different types of floating shelves and the décor you top them with. Plus, due to their inconspicuous installation inside the wall, you won't have any eyesore brackets sticking out beneath the shelf. It will appear as if the shelf is floating by magic.
For Use in Any Room
As long as you have direct access to the wall studs, you can install a side mount shelf bracket in any room of your home. The floating shelves that you can hang with these brackets look great in any family room, bedroom, kitchen, bathroom, and more. Installing floating shelves this way can help increase your storage, giving your rooms more space and adding a touch of modern style.


Floating Shelf Bracket : Get the Right Floating Shelf Hardware
Solid welded construction
Brackets with the highest strength have the rods recessed into the flat bar of the bracket and are welded all 360 degrees around it, on the back. It is a far superior construction method to face welding for both strength as well as ease of use. Brackets that screw or bolt together also are inferior to a solid 360 welded floating shelf brackets.
Support rods are large enough diameter
Typically, a 3/4" diameter rod is more than enough to handle most real life situations like say, 12" deep shelves with dishes or books on them. Typical shelf depths are 12" for kitchen, 10" for living room/bookshelves. A 3/4" diameter rod will handle both with ease. Using smaller rods like 5/8" or 1/2" means you wont be able to go as deep, or hold as much. Using larger diameter rods means you can go deeper.
Proper number of rods for your shelf length
It doesn't make sense to have a bracket with two rods supporting a shelf 70" long. More rods equals more strength and 70" is a lot of length to squeeze more rods(strength) into the shelf. Look for brackets that have multiple rods added as the bracket gets longer. Ideally no more that ~20" apart. If we use the same example, there should be 4 to 5 rods within a 70" long shelf to adequately support all the weight that could be place on that long of a shelf.
Bracket is constructed of thicker gauges of steel
Thinner steel bends, thicker steel withstands stress and higher loads. In this case beefier is usually better. Look for back bars at least 1/4" thick, and as wide as fits inside your shelf thickness. This helps eliminate twist or torsional flex. Torsional flex is bad in a floating shelf bracket, it means the shelf will sag sooner under load.
Appropriately sized bracket
Use a bracket that is sized appropriately to your shelf. Think about sizing two ways: length and width. First consider length, which is the long dimension of any given floating shelf bracket. Ideally your bracket should be 2"-4" shorter than your shelf length, as a rule. This means it will cross as many anchor points as possible on the wall. More places to anchor to the wall, equals more strength. Use them all. Next, width. This dimension is critical and is a major part of what gives a floating shelf bracket its strength. The whole point is to hide it, yet still be super strong. The best rule to follow is this, keep the floating shelf bracket back bar 1/2" thinner than your shelf is thick. For example, if you are floating a 2" thick shelf, the ideal shelf bracket should have a flat back bar that is 1-1/2" wide.
Application Scenarios of Floating Shelf Brackets
Elegant Living Room
Use invisible shelf brackets to support floating shelves in the living room for an attractive display. Organize your favorite books, decorative objects, and even a curated collection of art to showcase your personality while maintaining a refined and uncluttered vibe.
Chic Kitchen
In the kitchen, invisible shelf brackets can be used to install open shelves, providing a stylish storage solution for your cookbooks, spice jars and decorative ceramics. Not only does this add functionality, but it also allows you to showcase your culinary talents.
Bathroom Oasis
Give your bathroom a spa-like feel by installing floating shelves with invisible brackets. Arrange scented candles, plush towels and small potted plants to create a calm and orderly atmosphere.
Floating shelf brackets are the perfect way to give your home a modern appearance. Their hidden nature adds style and trend to any room. Whether you're looking for some added shelf space in your kitchen or somewhere to set your blankets in your laundry room, a floating shelf bracket is the perfect solution.
Purpose
The first and most important factor to consider is the purpose your shelving will serve. The intended use will tell you which floating bracket will be best for your project. If you're looking to place the shelves in your home office, you won't need as strong or sturdy of a bracket. You have to figure out where and for what purpose you will use the floating shelves before you can select a bracket.


Weight Capacity
Your purpose for the shelves will give you an idea of what weight capacity you're going to need. If you're looking for something that will provide strength and security, you're going to want a heavy-duty hidden shelf bracket. If you're looking for a bracket that can support a larger floating fixture, such as a fireplace mantel, you're going to want a floating mantel bracket. Knowing both the intended use and the necessary weight capacity will help you select the right brackets for your project.
Drywall or Wall Studs
The weight capacity will also help you figure out which installation process you should use. Different brackets require different installation procedures. Our heavy-duty brackets come with six mounting holes, which means you're going to want to install it behind your drywall and onto your exposed wall studs. For other uses, our brackets can also work directly on your drywall.
How to Install Floating Shelf Brackets
Step 1:
Ensure that the area you are fitting the shelf to has no electrical cables or water pipes installed within the wall. You can do this with a pipe, cable, or stud detector if you have one. If in doubt, consult with a tradesman to determine this. Please do not try and install your shelving without having done this.
Step 2:
If you are installing your shelves onto a plasterboard wall, you will need to find two studs in your wall to anchor your shelves. Studs are two vertical wooden supports in the framework of your wall. You can do this using a stud detector (not supplied). Use your pencil and spirit level to draw a horizontal line on the wall where you intend to fit your shelf board. The line should be as long as the distance you will have between the holes into which the brackets will be drilled.
Step 3:
Lift your shelf up against the wall, and use it to mark along your horizontal line where the first bracket should go by placing a dot or a line at the centre of where the drilled holes will be. You can then mark the distance to the second bracket.The more accurately this is done, the easier the rest of the installation should be.
Step 4:
● For Standard Brackets: Use a 10mm masonry bit and drill a hole 60mm into the wall at the centre point of your marks on the wall. Keep the drill as level as possible with the drill bit perpendicular to the wall. You can determine the depth that you're drilling by wrapping some masking tape around the shank of the drill bit, 60mm from the drill point of the drill bit.
The hole should be deep enough so that the supplied wall plug sits flush with the wall once inserted into the hole. If necessary, gently tap the wall plug with a hammer to ensure that it is flush. Then fit the supplied washer and screw the bracket into the wall plug.
Repeat this process for all the necessary fixings on the shelf. Once all the screws have been fitted, slide the shelf halfway onto the screws. Tighten the brackets as much as possible into the wall, using the spanner and use the spirit level to ensure the shelf is level while doing this.
● For Adjustable Brackets: Using a 7mm drill bit, drill a 50mm hole into the wall at the centre points of the marks you have made in the wall. Make sure to keep the drill as level as possible - being perpendicular to the wall. You can determine the depth that you're drilling, by wrapping some masking tape around the shank of the drill bit, 50mm from the drill point of the drill bit.
Apply the bracket to the wall with the lip facing upwards. The bracket usually has a series of slots or holes that allow you to adjust the height of the shelf. These slots or holes may be evenly spaced or may have more options in areas where you need more flexibility. Our adjustable brackets have screws or locking mechanisms that you can use to secure the shelf to the brackets.
Step 5:
If you would like to add some more security, you could add a small amount of glue (not provided) into the holes of the shelf and leave it to set for 2 hours however this isn't necessary. After this, you are ready to enjoy your shelving!
FAQ
Hot Tags: invisible wall brackets, China invisible wall brackets manufacturers, suppliers, factory, Galvanized Steel Angle Brackets, Metal Angle Supports, Stamping Parts Angle Corners Metal Brackets, Solar Panel Mounting Stand, Stainless Mounting Brackets, Seismic Cable Bracing



Send Inquiry
